Security
Security is configured in the Admin Dashboard by using Teams, Roles, and Permissions.
Schema
The diagram below shows the relationships between the security entities. Users are assigned to Teams, while Roles can be assigned to both Teams and Users. Permissions are assigned to Roles. Users inherit permissions from their Roles and Team's Roles.

Permissions
Permissions for Roles can be configured from the Admin Dashboard under Security -> Roles. Permissions are additive, meaning they accumulate from multiple roles.
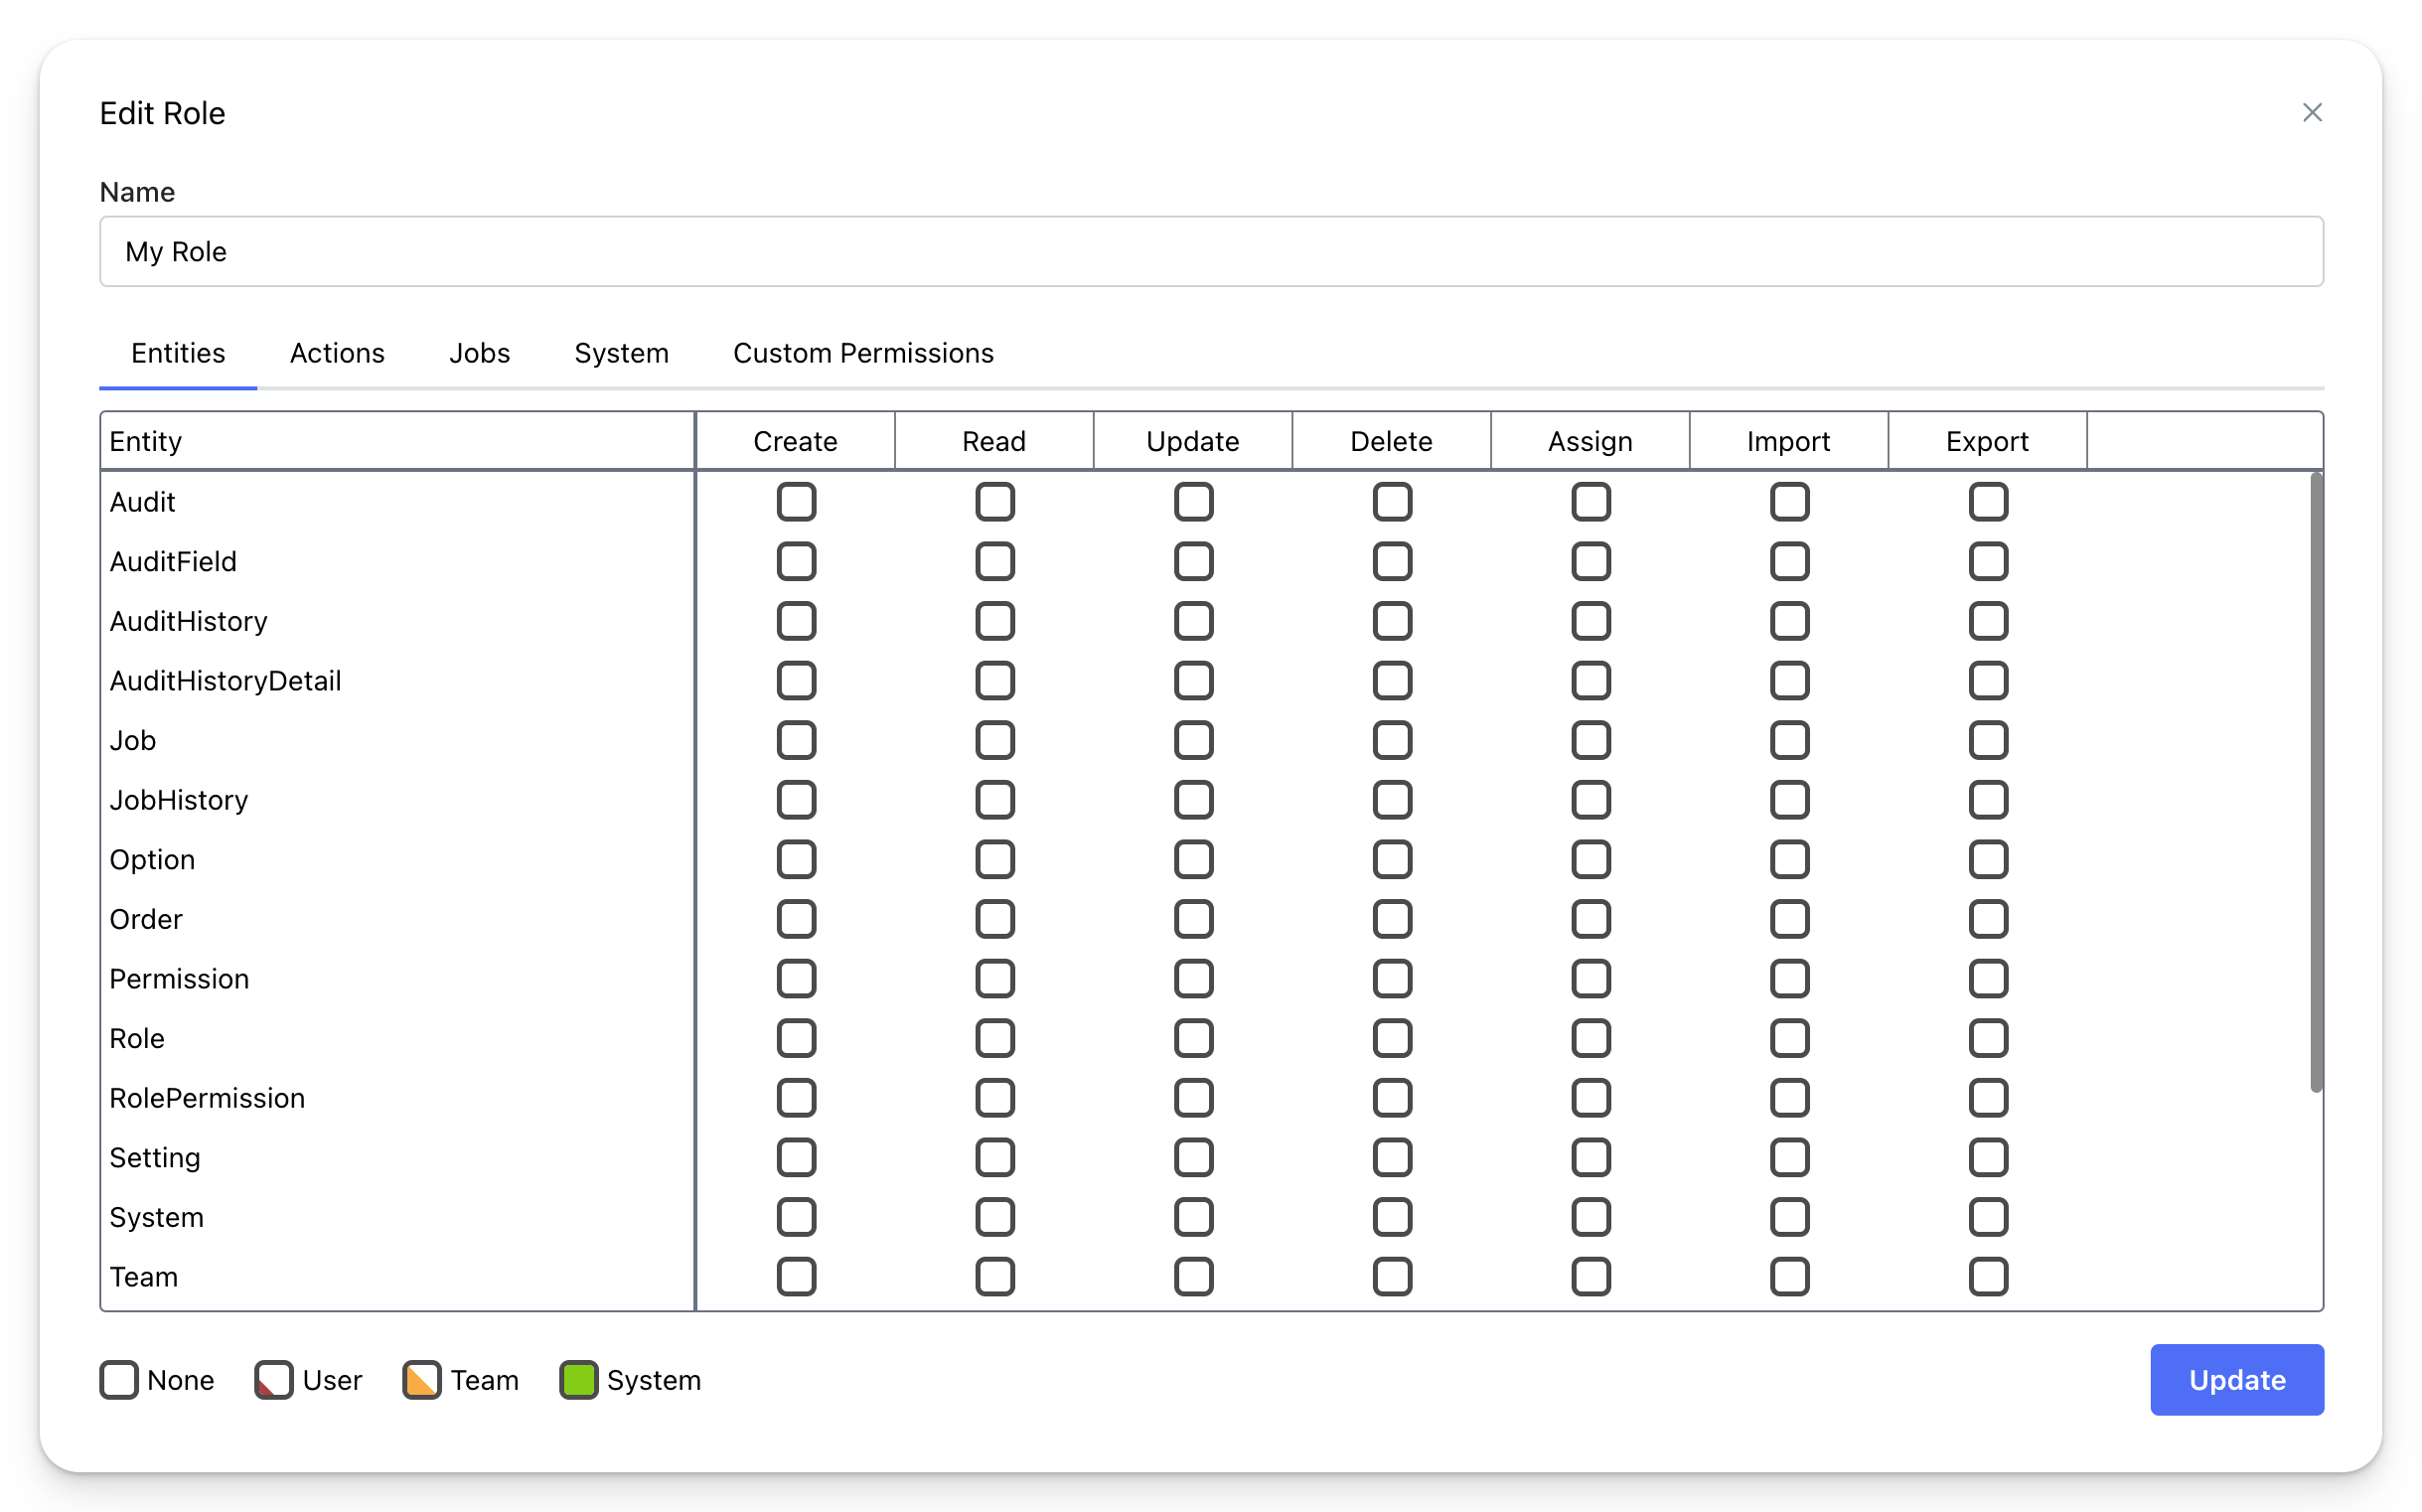
Create, Read, Update, Delete, and Assign permissions can be set at the User, Team, or System level. Entities that inherit from the BaseEntity class will have OwningUserId and OwningTeamId fields, which determine the record owner.
The OwningUserId and OwningTeamId fields can be set simultaneously, but at least one must always be specified.
- User-level permissions: Users can only create, read, update, or delete records
where the
OwningUserIdfield is set to their user ID. - Team-level permissions: Users can create, read, update, or delete records
where the
OwningUserIdfield is set to their user ID or where theOwningTeamIdfield is set to a team they belong to. - System-level permissions: Users can create, read, update, or delete any record in the system.
If a table does not inherit from the BaseEntity class, System-level permissions are required to Create, Read, Update, and Delete records. In this case, records cannot be assigned or have ownership, as they lack the OwningUserId and OwningTeamId fields.
Multiple Owner Fields
The OwningUser attribute allows multiple users to own a single record by marking additional Guid fields as owner fields. This is useful for entities like messages, tasks, or transactions where multiple users need equal access to the same record.
Project / Entities / Message.cs
When a user has User or Team-level permissions, they can access a record if they match any owner field. In the example above, both the sender and receiver can read, update, and delete the message.
- User-level permissions: Users can access records where any
[OwningUser]field matches their user ID. - Team-level permissions: Users can access records where any
[OwningUser]field matches their user ID or where theOwningTeamIdmatches a team they belong to. - System-level permissions: Users can access any record regardless of owner fields.
Enforcing Owner Field Rules
In some cases, you may want to give multiple users access to a record while restricting which owner fields they can assign. For example, in a friend request system, the issuing user creates the request and should be assigned to OwningUserId, while the receiving user is assigned to a [OwningUser] field. The issuing user needs System-level assign permissions to assign the request to any user on the platform, but you want to ensure they can only assign themselves to OwningUserId and cannot change it later. Use security attributes to enforce these rules.
Project / Entities / FriendRequest.cs
In this example, UIReadOnly on OwningUserId automatically sets it to the current user and prevents any changes via UI or API. UICreateOnly on ReceiverId allows the issuing user to set it on create (using their System-level assign permissions), but prevents modification afterward. The receiving user (matched by ReceiverId) can accept by updating the friend request as long as they have User-level update permissions, since they are an owner of the record.
For complex business rules beyond owner enforcement (status transitions, validation, etc.), use Service Logic. See Service Logic documentation for details.
Assign
-
No assign permissions: Users can only assign records to themselves. If no owning fields are set,
OwningUserIddefaults to the user creating the record. -
User-level assign permissions: Users can assign the
OwningUserIdor any[OwningUser]field to any user in the system. Users cannot assign theOwningTeamId. -
Team-level assign permissions: Users can assign the
OwningUserIdor any[OwningUser]field to any user in the system. Additionally, they can set theOwningTeamIdto any of the teams they are a member of. -
System-level assign permissions: Users can assign the record to any user (
OwningUserId,[OwningUser]fields) or team (OwningTeamId) in the system.
Security Attributes: UIReadOnly on OwningUserId overrides assign
permissions - the field is always set to the current user and cannot be
changed. UICreateOnly fields respect assign permissions on create, then
become immutable on update.
Import & Export
To enable the ability to export, import, and download the Import Template, the following permissions must be enabled: ACTION_TABLE_ExportData, ACTION_TABLE_ImportData, and ACTION_TABLE_ImportTemplate. These permissions are located under Role -> System. Once these are enabled, Import and Export permissions can be configured for each table individually.
-
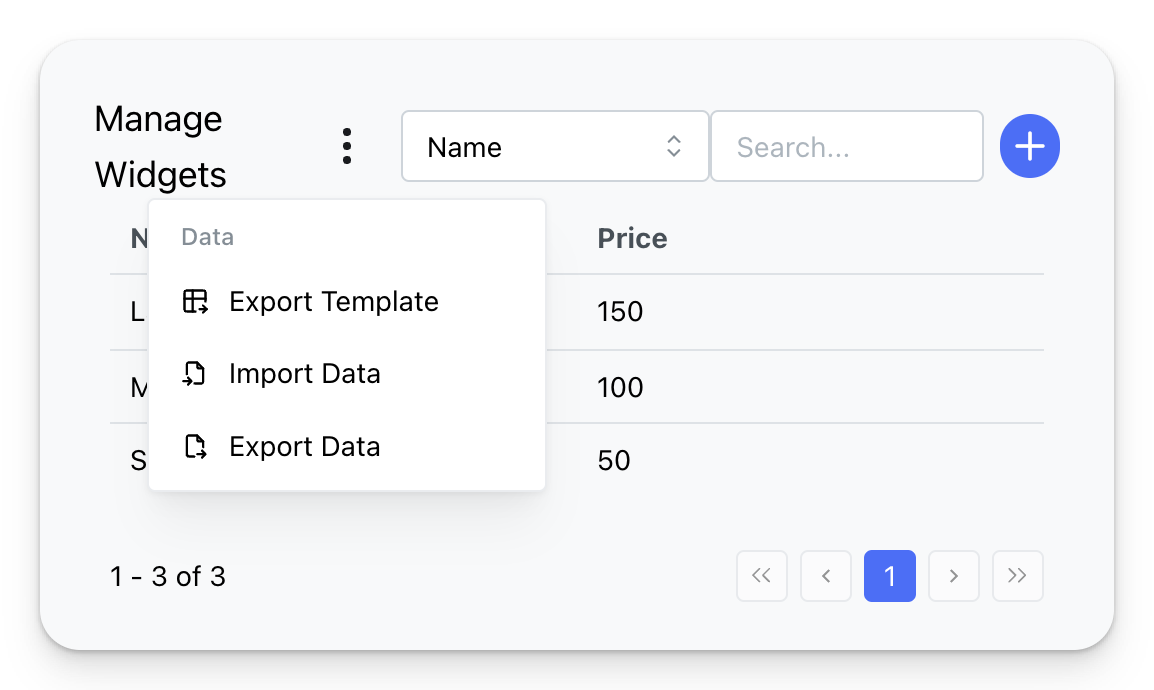
Import permissions: Users with import permissions can import data using the provided Excel Export Template.
-
Export permissions: Users with export permissions can download the current table view as an Excel file.
Custom Permissions
Custom permissions are useful for creating permissions that are tailored to the specific needs of your application, allowing for detailed control over access to custom functionality.
Custom permissions can be created from the Admin Dashboard by navigating to Security -> Permissions. Once created, custom permissions can be assigned to a role by selecting the Custom Permissions tab when updating the role.
Checking Permissions
In React, you can check if a user has any or all permissions from an array by using the hasAnyPermissions or hasAllPermissions methods from the useAuthRequest hook.
src / components / MyComponent.tsx
From the ServiceLogic use the Permissions method of the ServiceContext to return an array of matching permissions the user has.
Project / Services / MyEntityService.cs
Permission Names
Table permissions follow the convention TABLE_(TableName)_(Operation)_(Level).
For example, the System-level read access permission for the Widget entity is TABLE_Widget_READ_SYSTEM.
The operation can be one of the following: CREATE, READ, UPDATE, DELETE, or ASSIGN. The level can be USER, TEAM, or SYSTEM.
Import and Export permissions follow the convention TABLE_(TableName)_IMPORT and TABLE_(TableName)_EXPORT.
Actions follow the convention ACTION_(ActionName).
Realtime hubs (SignalR) follow the convention HUB_(HubName).
Job permissions follow the convention JOB_(JobName).